This guide will show you how to make catchy melodies from scratch – the kind that your listeners won’t be able to forget! These techniques work even if you don’t know music theory – and they work for any genre of modern and electronic music.
We go into every step of the melody-writing process from…
- Defining the vibe
- Choosing a scale
- Writing a bass line
- Building a chord progression
- Writing the ideal melody for your track
- How to make your melodies evocative and unique
- Common mistakes producers make when it comes to writing melodies
- Tips and tricks that the professionals use to get their melodies really catchy and really memorable.
I’m also going show you something I haven’t seen on any other tutorials – how to create effective counter melodies – which will really make your track stand out, so let’s get to it…
Start a Melody by Choosing a Piano Preset
The first mistake I see people making is not choosing the right preset with which to write their melody.
I really like to use a piano and I recommend that for a couple of reasons.
One, you’re not going to get distracted by using crazy sounding synths if you’re using a piano. So you’re going to be focusing on just making a really strong melody.
The second reason is that when you’re programming a piano in midi, it reacts to the length of the midi note. So a longer note will be sustained, a short note will end quicker. Some synth patches aren’t reactive to the length of the midi note. So that’s the second reason.
The third reason is that it’s such a familiar and popular sound to hear. So if you want to send your track to a singer to get her or him to sing that melody, having a simple piano sound makes it really easy for them to do that. Okay, so that’s the first thing to mention.
Vibe is King
The second is that vibe is king. So how you create the melody really depends on the vibe you are trying to create. So it’s important to have an idea of the direction of the track you start before you even start writing, because if you’re writing a big room trance track, that’s going to be very different from if you’re writing a slow ballad or a Hip Hop track.
It’s going to determine how complex the melody should be, which notes the melody should be hitting, whether it should be happy, whether it should be sad, so everything should work with this one particular theme or vibe that you are going for.
Select a Scale
Okay, next thing to do is to select the scale you are going to be working in. Now it’s very easy if you’re working in MIDI to change the scale afterwards, but what is super important is as to whether it’s minor or major.
A minor is the simplest scale to work in because it’s just all the white notes from A up to A.
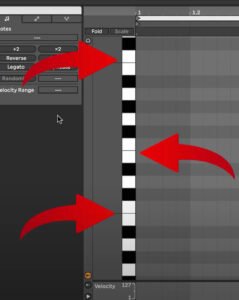
But if you are using Ableton or FL Studio or Logic or pretty much any DAW nowadays, you’ve usually got a scale feature that you can just click and you can choose any scale that you want and it’s going to allow you to only show the notes from that scale and you’ve got these different modes of scale as well.

A simple major or minor scale would be the most common. So I’m just going to choose this scale, A flat minor.
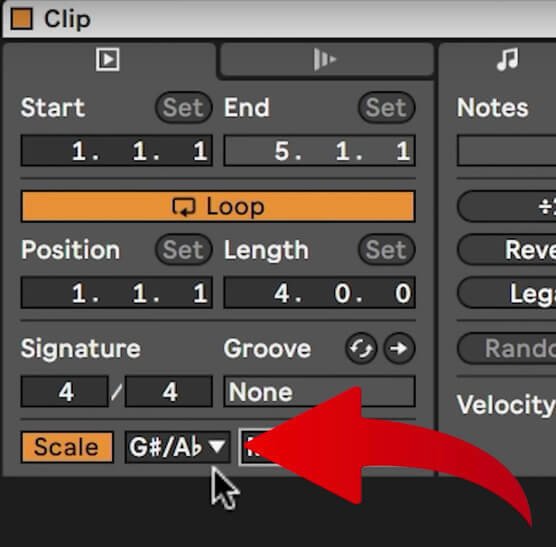
Press this scale button and only the notes from that scale are gonna show now.

So it’s super easy.
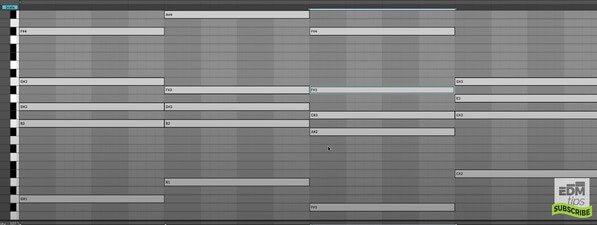
Writing a Bass Line for your Melody
Now when it comes to creating the melody, the notes you’re going to be hitting really depend on the bass and the chords that you’ve already got in the track.
So the easiest thing to do is to start with the bassline, build out the chords, and then work the melody into that.
So let’s start by doing that. Let’s create a chord progression. We’re just going to start on the root note of the track. We’re going to pick four bass notes starting on the route of the track.
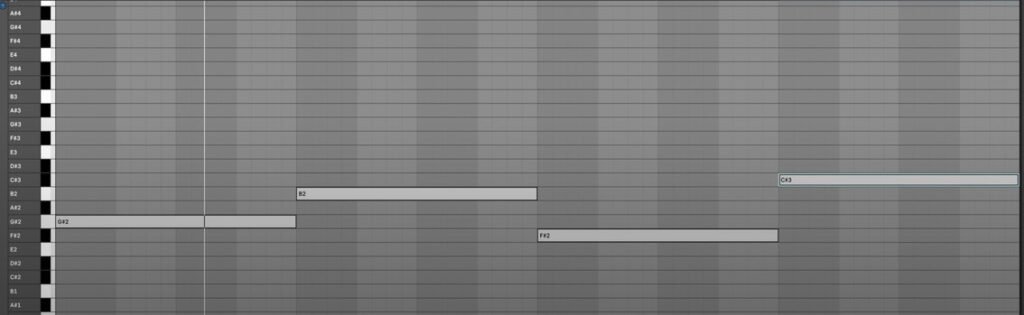
So let’s build out the chords based on these bass notes. Then we’re going to show you how to spice them up and then work in our melody.
Building the Chord Progression
So I’m just going to skip a note each time to build out some basic triads.
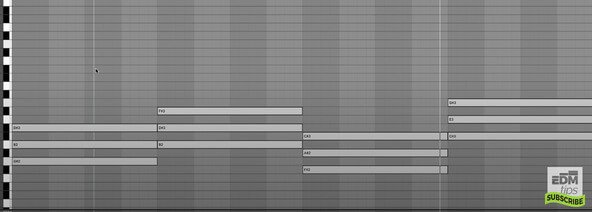
A mistake producers make is leaving their core progressions really generic. Let’s take a listen to this example:
So now we want to make these chords more interesting. I’m going to show you three techniques how to do that.
- The first of which is building out a seventh note in each of these chords.
So if the first note in accord is the root, this one here is the third because it’s the third interval, 1, 2, 3, and then four, five, that’s the fifth interval. Let’s put a couple of sevenths in there as well. Completely changes the vibe.

2. Next of the second tips is to spread top notes across different octaves and that will almost make top notes a melody anyway.

And we can spread some of the lower notes across the octaves as well.

And then these first notes of the chord, these roots, I’m just going to put some of them up an octave and that’s called a chord inversion.
So it’s the same notes but just played on different octaves and that will instantly make it sound a bit more interesting. So let’s try that.
3. And a third way that we can spice up our chord progression is with the rhythm of the chords as well.
So in particular, if you have a second chord play just before it leads into the next one, it’s going to allow the listener to know there’s a chord change coming, but there are different techniques we can use for chord rhythms, but therefore a different video up. I’ll link to it now and we’re just going to do the same technique for this chord as well. Now to make it even more interesting, I’m just going to change these notes here, here to another note within the key and see how that sounds.
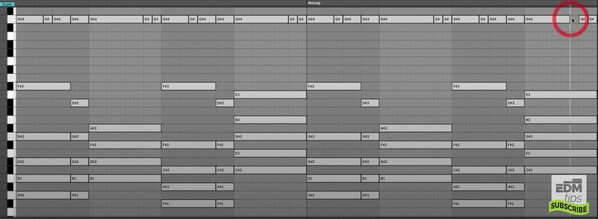
Writing a Melody
Lovely. So now we’ve got our bass notes and our chords. We can write our melody and what I’m going to do for this is just duplicate our piano and we’ll call this melody and having our bass and our chords and our melody all within the grand piano is going to allow us to make sure that we are hitting the right octaves as well.
So there’s space in the frequency range for all three elements to breathe together. Then when we actually do move to using interesting presets for each of these elements, we already know they’re going to be in octaves that are going to compliment each other well.
So I’m just going to drop our chords down an octave so we’ve got space for our melody. Beautiful. So nice.
Melody Rhythm
Okay, this is the easiest way to create a melody.
The first thing is to focus on the rhythm of the melody first, just using the root note of the key that you are working in. So for example, we are working in G sharp minor.
So if we get a G sharp, now we can focus just on creating an interesting rhythm before we actually change the pitch of each note in the melody. So the key here is to find a rhythm that works with any of the other elements that you already have. If you’ve got drums, if you’ve already got the bass and the chords, the rhythm of your melody, we’ll have to interplay with those different elements.
If you’re starting as we are today using just the basic chords, basic bass, the melody can really run the show from this point on. So we can choose any melody and then everything else will have to work around that.
Simplicity is key.
You don’t want your melody too simple, but you don’t want it so complicated that it just sounds ridiculous.
Let’s draw in a simple melody rhythm that’s going to work with these other elements.
And what we’re going to do here, and this is very important when it comes to melody, is to use repetition of the rhythm. The more repetition you’ve got in terms of pitch and of rhythm, the more memorable that melody is going to be.
Duplicate the first rhythm, so it’s doubled up, then create a slight variation at the end of the second time it goes through.
We’ll just add one more note there, but you can see this is a very simple rhythm and I’ve got both clips selected, which is why you can see all the notes at the same time, which can help and make things easier as well.
Melody Pitch
Okay, so now we are onto changing the pitch of each of these notes we’ve programmed in for our melody.
Now there are a few notes that you can hit with your melodies that make them even stronger. So I want to touch upon those first. Now the first note is – unsurprisingly – the root note of the track. Now if you remember, the key of our track is in G sharp Minor (which is the same as A flat Minor). So that means the root note of our track is G sharp.
So, obviously, hitting that note with our melodies several times, it’s going to give it a really nice strong foundation.
Now the second note is the third. So if you move up to the third, that’s this position. And two other notes that are really strong to use is the fifth and the seventh.
Now the other in between notes can be used for little runs and flourishes depending on the vibe and the emotion that you want to create.
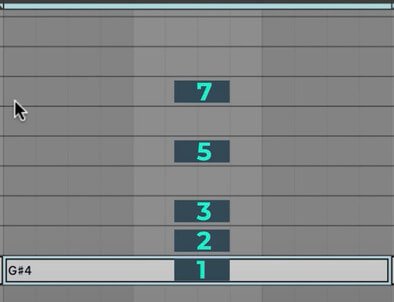
So let’s create our melody using the first, the second, the third, the fifth and the seventh. And just stick to those notes and see if we can make something strong sounding.
So let’s examine how I’ve done this. We’ve repeated the rhythm exactly the same for the first and the second. We’ve repeated the root note several times to lock in the key of the track and make it really strong. So we’ve got the G sharp, the G sharp, the G sharp, and another long G sharp there and a little one here.
But what we’ve also done is repeat the shape of the jumps. So here we’ve got the seventh going down to the fifth, and here we’ve got the third going back to the route. So you can see the jump between these is the same. We’ve got one note in between and here we’ve got it running up. And here we’ve got it running down. So we’ve got repetition not only in rhythm but in the pitch patterns as well.
Adding Interest to Your Melody
So now let’s take that melody and duplicate it as we did before, but remember we wanted to have this extra note here the second time it runs through.
And we are also going to switch things up so the end of this melody loops round to the beginning. And again that’s something that’s really important and people often make a mistake is they’ll leave it here and they won’t make sure that it loops round smoothly and sounds like it’s leading back into that melody. The chances are this is going to be looped several times throughout your track.
So for the fourth part of the melody, this is when it’s nice to switch things up again. And once more, it depends on what vibe we’re going for, but my gut says because this is quite an emotional sad song, I’m going to take this down rather than going up further.
I’m going to use the fourth interval in the key, which is the C sharp just because I think it really hits that emotional note.
And remember we are looping back to this G sharp, so I actually want to have a note that’s going to lead up to it.
So here we are going from the E up to the F sharp, knowing full well that we’re going to loop back to that G sharp. If I make this F go down, it’s going to sound a bit weird and jarring When it loops around,
It sounds much better when it resolves back, so we are taking that into consideration as well.
Counter Melody
So now we’ve got our basic melody that fits the vibe of our track and it’s in the key. We’ve got repetition of rhythm, we’ve got repetition of the shape of the pitch jumps.
Now I want to create a counter melody.
So what is a counter melody? It’s basically a second melody that contrasts and simultaneously bolsters your main melody. This isn’t used in all genres of music, but it’s nice to have this tool in your toolkit, especially if you’re using perhaps different instruments to play that counter melody.
And the best tip I’ve seen of how to think about this is two different characters in a play. So one might be talking to the other, so there’s an interplay, there’s like a conversational tone between these two melodies.
So let’s write the counter melody in the same instrument as our main melody. And once again, what we’re going to do is work out the rhythm of that counter melody before we work out the pitches and we need to make sure that rhythm interplays with the main melody.
Again, we are going to keep this very simple in terms of rhythm. Repetition is key here. So I’m just going to duplicate this like so we will get rid of some of these, but we’ve got this repetitive motif of rhythm that’s going to solidify the theme and the entire melody.
So now let’s change the pitch of some of these notes.
I’m going to switch these a little bit because I think they’ll sound better. And then we’ll probably just repeat this rhythm instead.
Ok, this is the rhythm we’re going to use. So I’ll delete those and I’ll then duplicate this one instead. And then we’re just adding a little flourish there.
So this frequency is twice as fast as the main melody. And now let’s just duplicate that. Remember we’re repeating both the rhythm and the pitch shape, but we’ll probably switch it up in the second repetition.
And I’m repeating this interval jump here as well. So let’s put those back in cause I like that. And for this second part, I’m now going up with our melody again to keep things interesting, but the interval jumps are still the same. And this runs down whilst the main melody runs up, which links us back beautifully to this G sharp here. We could run it back up so that we link back to our G sharp here and octave up,
Which I think is actually stronger. So we’ve got the main melody looping back to the main melody. We’ve got our counter melody looping back to our counter melody.
Now if you imagine two people singing these two melodies, it would work beautifully together. You could even take some of these out and just make it a much more of a sporadic jump between the two melodies. But I really like it the way it is.
Now, as I said, a common mistake producers make is to overcomplicate their melody and think it really needs to be complicated to make it sound interesting. So even if you’re using the notes from within the scale, it’s easy to overcomplicate it. So here’s an example of what it might sound like.
Yeah, okay, you might think, oh that sounds pretty and baroque, but the truth of the matter is no one’s going to even acknowledge that as a melody, let alone remember it and sing it back. And that’s what we are trying to do. We are trying to create something memorable because the melody is what sticks in people’s head when they listen to a piece of music most of the time, like 98% of the time. So, simple is key.
Humanising Your Melody
Now the last thing I want to touch upon is how to humanize your melody because this sounds quite robotic at the moment, whilst it’s quite pretty sounding and we want to make it sound like, like it’s played with emotion. And the way we’re going to do that is slightly tweak the timing and also to use velocity. Velocity for most instruments by default is assigned to the volume.
So with a lower velocity, the note is quieter, but you can assign it to many different parameters. And if you are using a synth to play your melody, that can be particularly interesting because you could assign it to a low pass cutoff filter, for example, which means that your sound is going to sound filtered out if it’s got a lower velocity.
So with this example, the first thing I’m going to do is really take down the volume of the counter melody because I want people to be able to sing my melody and you can’t sing two notes at once. It’s confusing, so I’m going to take it right down. So this melody here is what I want people singing the main melody. Let’s just put that up and volume a bit.
We’re going to take the chords down in volume a little bit as well, but I want people to really feel the emotion when they hear this melody. The easiest thing to do is if you play it via a piano or keyboard, you’re naturally going to have different velocities as well. But if you’re not an amazing piano player, like I’m not, you can just program them in. So the first thing I’m going to do is think about which notes I really want to be accentuated and then we’re going to increase the velocity on those.
So that would be a really strong note. And the first note, so again, you can see my strong notes are actually falling on each bar, so we’ll make this one stronger as well.
In fact, what I’m going to do is take down all of the notes in my main melody a bit, because then I’ve got more headroom to work with.
So this is the first note of the bar. I’m going to bring all of those up in volume and this leading note before each change of chord. I think that needs to be strong as well. So let’s bring that up, this is almost a rhythm within a rhythm. These strong notes are almost a rhythm unto themselves.
These are the main notes that people are going to hear and sing to.
To make it even more humanized, you could actually, within Ableton specifically, you can randomize the velocity. So if we choose the range we wish to randomize it, that’s going to mess up all the work I’ve done. But just to give an example of what it sounds like.
So what you could do is actually randomize it and then again, go back to the core notes that you want people to remember and then boost all of those in volume. So you’ve got the best of both worlds. Then you’ve got the random human feel, and we’ve also got our main notes really strong.
I quite like that actually.
Now this is easier in FL Studio and logic. So the way you do it in Ableton is you use a groove template. So I’m just going to pick a random groove template.
I’m going to drag this onto our melody, like so, and then we can adjust the timing here and randomize it slightly as well. And the higher number you select, the more that is going to be off the exact grid, which gives it a human feel.
Or you could do it manually by just dragging some of the notes slightly forward or back. But again, that’s going to take a bit more effort and a bit more time. It’s easier to just experiment with the groove templates.
And once again, the vibe will dictate whether you do that or not. If it’s a Trance track, the chances are you want it bang on the grid. If it’s a slow ballad, the chances are you want to sound like it’s being played by human.
Using Reference Tracks
Now, one extra top tip I want to give you when it comes to writing melodies is using reference tracks. So whichever style that you are producing in, I recommend finding a really good track that you absolutely love with a strong melody and working out which of these techniques I’ve shown you today they’re using and when and why they’re using them.
Then you can create your own melodies that will be appropriate to the genre and the vibe that you are going for.
So I really hope you’ve enjoyed this today, guys.
If you want in depth coaching with me and to take your music production to the next level, perhaps get signed to your favourite music label right by many of my other students. Do check out my music production accelerator program HERE: https://edmtips.com/accelerator
Until then, cheers and happy producing!
