If your music lacks dynamics, movement, life and generally excitement or if you get stuck in an eight-bar loop and don’t know how to finish your track, this is for you! Ableton automation (or automation in any DAW), is one tool that every single professional music producer knows how to get the most from. Make sure to read to the end because the real power comes when you apply all of these techniques together.
Record The Automation
First off, if you prefer a more hands-on approach and you’ve got a MIDI controller then you don’t need to program in automation via your mouse. Instead, you can actually assign any of the controls within your DAW to one of the MIDI controls on your controller. Now, just modulate these parameters manually and record them as you go. Aside from this being quite a lot of fun, it also sometimes renders a more natural feeling and introduces a bit more spontaneity.
This is the Ableton way to record this in:
1. Make sure that the MIDI track is armed.
2. Be sure to hit the overdub button because if you don’t, and you start recording, you’re going to record over those MIDI notes as well – and you don’t want that.
3. Hit record, press play and move some knobs and faders! ☺
4. When you’re done just stop the recording and hit “A” to show the automation.
Obviously, from this point, you can still tweak it. But that’s it, that’s the basics of automation right there!
Next up, we’ll dive into the most common parameters that you want to automate.
Volume Automation

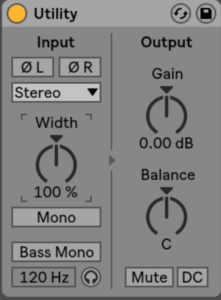
Automating the volume might be one of the most essential parameters to automate. But let me point the following out right away, be sure NOT to automate the volume on the mixer channel! Because if you later want to mix that channel’s loudness, you’d have to tweak all automation points individually. So, instead, throw in a dedicated gain plugin which in Ableton would be called “Utility”. All you need to do now is to right click the gain knob and choose “Show automation in new lane” and you’re ready to automate!
EQ / Filter Frequency Automation
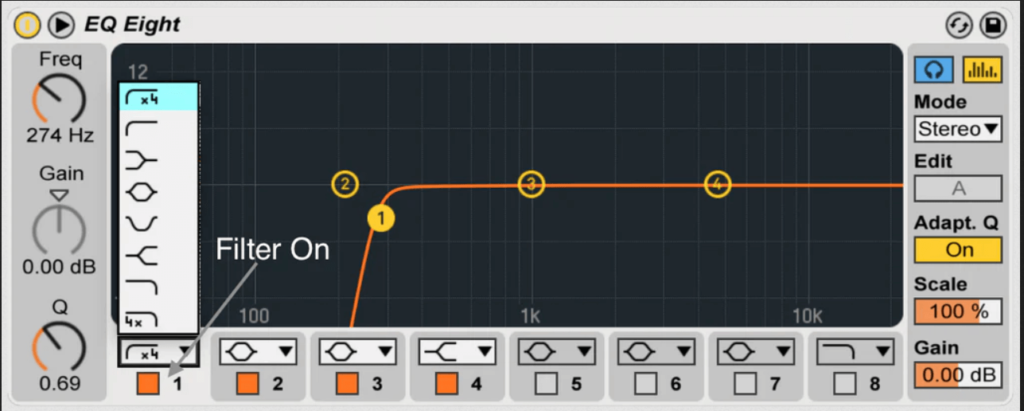
Very powerful for transitioning into the drop is to apply a high pass filter on particular sounds or your entire mix even and gradually automate the cutoff frequency during the build-up. This way you can slowly filter out more and more frequencies only to bring them fully back right when your drop starts.
Same can be done for the high-end too! It’s the same idea but this time we’re starting with the highs.
Note, you can very well combine these two methods for even more impact once you bring the full frequency spectrum back. Furthermore, take advantage of the Q-Value. It can be automated too and can lead to a more interesting sound. But don’t go too far – it might become very resonant fast!

Ableton Pitch Automation
The next most powerful and widely used parameter that you can automate is pitch. This can really help you with your arrangement.
Let’s say, you want to create a riser. Start with playing a sustained note (the root note of the track is a good starting point) and then draw in a pitch automation starting from -12 semitones going all the way up to +12 semitones. This will cover two full octaves and make a nice, tonal riser.
Wonderful also on build up drums like your snare that goes faster and faster. Just pitch up your snare using Ableton’s Sampler as the snare speeds up approaching the drop.
Group Automation
The next fantastic Ableton automation trick is to apply it across an entire group. Chances are, if you want to filter out certain frequencies on, let’s say, the bass, you want that to happen on all your bass layers and not just on one. So, instead of creating one individual frequency cutoff automation per layer, apply one on the entire group to make all the elements in that group work towards the same goal.
Ableton Send Automation
For the next trick, we’re running our drums through a send channel with reverb. For that, we create a new auxiliary channel with an instance of a reverb plugin and send our drums (or whatever element you want to apply this technique on) through it. The magic happens when we automate the send control only. This way, we retain the dry drum signal but can also gradually blend in the drum wash (i.e., the fully wet reverb drum signal) into the mix.
Incidental Send Delays
The send automation we just explored is exactly what you need again for the next trick – incidental send delays. This is powerful on vocals because it allows you to exactly choose which syllables or fragments get sent through the delay channel. To do that, create an auxiliary channel, put a delay unit on it and set it to a hundred percent wet. Open up the send control now via automation but only exactly when the part of the vocal gets sung that you want to have delayed and then close it right back down again. In order to keep the delay amount under control simply automate the delay feedback as well and bring it back to zero to stop the delay effect. This is wonderful for vocals but does work nicely on leads too for example!
Advanced Automation

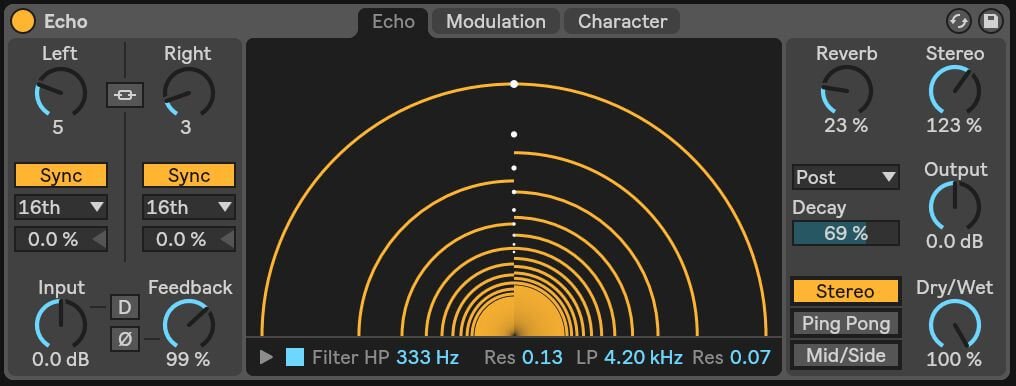
Another really interesting effect is automating the time delay between the left and the right signal on Ableton’s Echo plugin. This will lead to ever changing movement in the stereo field for as long as you keep automating. It may have kind of a Haas effect when the difference between the left and right signal is relatively short but may evolve into a very wide bouncy ping pong nature if the time delay is opened up enough. In any case, it introduces interest into your lead, arp or synth sound.
This can be further combined with automating the delay feedback and if you now add a sidechain compressor on top for some extra bounce, you’re golden!
Ableton Clip Automation (“Automate Automation”)

“Automate the automation” might sound confusing at first but essentially what we’re doing in our next trick is creating an automation pattern we want to repeat in nature but evolve over time. For instance, let’s create a filter that opens up and closes down over eight bars. But each time the cycle repeats we want the filter to open up a bit more than it did last time. To bring this into effect, we establish first a filter automation as we’ve learned it before. The difference, however, is that we nest that automation within the MIDI clip itself. As we automate the nested clip automation in arrangement view, we can gradually open up our previously created filter automation which is super powerful for synth acid lines.
Macro Automation
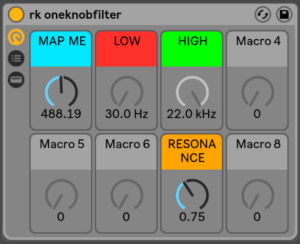
 Finally, let’s discuss macro automation to make the whole process much easier. Macro automation basically means linking multiple parameters to one knob which you then automate in the project. For instance, if you have an effect rack consisting of many plugins grouped together, try to map multiple parameters to one macro knob. It takes a bit of experience and/or experimentation to know what works – but figuring that out is part of the fun!
Just click on the map button and assign the parameters.
Now it’s your turn to get creative and link filter, reverb, delay, volume and even parameters from inside the synth together and create amazing transitions to perfectly move from one section of the song to the next one – just like a pro!
We hope you found these Ableton automation tricks interesting. Which one is your favourite? Which one will you try out in your next track? Write us a comment below and let us know!
Happy producing!
